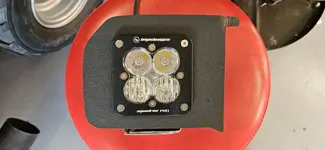
Baja Designs Squadron Lights

AXE

Joined
Feb 21, 2023
Messages
5,096
Reaction score
11,980
Genesis 1:3-5 says: And God said, “Let there be light,” and there was light. And God saw that the light was good. And God separated the light from the darkness.

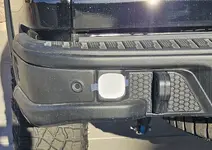
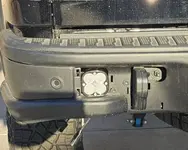
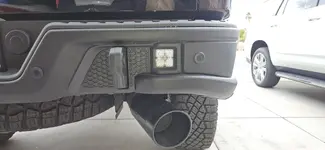
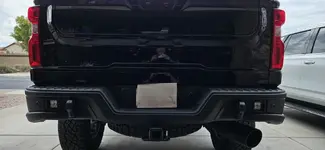
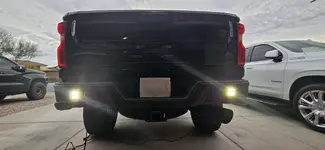
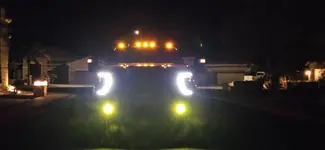
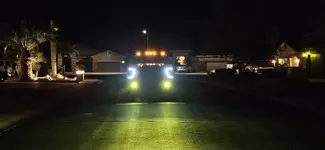
But sometimes you need a little more light in the darkness too. These Baja Designs Squadron work scene lights mounted in the rear Bison bumper will give you plenty of light.

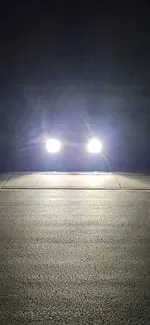
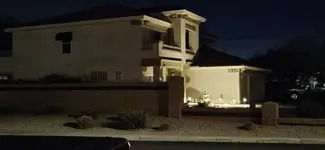
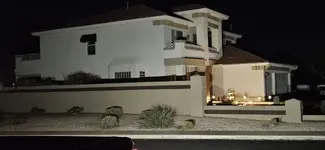
I was worried they might not put out as much and since some of the lense is blocked by the small cutout I thought it might be compromised. But these things are so damn bright, they light up the whole neighborhood.

They might be a little too bright for my needs as they might produce a lot of reflection of my campers and trailers when hooking and unhooking in the dark. I might have to add some tint to tame them down a bit.

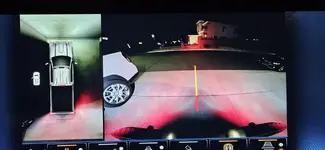
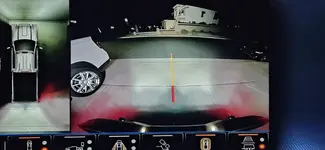
Here some pictures in front of my house near a streetlight. Looks like the sun rising on the house next door. You can see a huge difference in the backup camera. You'd blind people in a parking lot.
 

Attachments

  • 20240228_192008.webp
    20240228_192008.webp
    313.2 KB · Views: 212
  • 20240228_192157.webp
    20240228_192157.webp
    119.5 KB · Views: 148
  • 20240228_192206.webp
    20240228_192206.webp
    120.4 KB · Views: 146
  • 20240228_192138.webp
    20240228_192138.webp
    67.6 KB · Views: 141
  • 20240228_192126.webp
    20240228_192126.webp
    79.6 KB · Views: 146
Last edited:
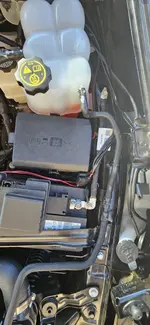
Still have the switches to mount and front lights to do, but here are the lights and harnesses I used.

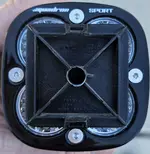
Baja Designs Squadron Sport Black LED Light Pods - 2 LED Lights with Wiring Harness (Work/Scene; Clear) https://a.co/d/gpm9D5v

Baja Designs Squadron Pro Black Flush Mount LED Light Pod (Driving/Combo; Clear) https://a.co/d/amnW96n

Baja Designs Squadron/S2 Wire Harness 2 Lights Max 150 Watts Baja Designs https://a.co/d/d9a1oVI
 
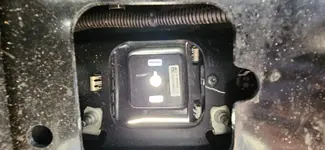
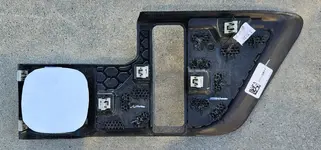
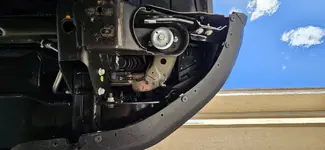
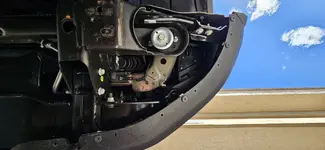
Here's what your dealing with underneath. That white paper is the template for the Baja Designs Squadron lights. If you just cut the square out from behind the plastic insert, you lose a lot of light. But if you cut much more, you'll lose the integrity of the plastic and the ability to attach it to the adjacent piece.
 

Attachments

  • 20240222_171350.webp
    20240222_171350.webp
    144.7 KB · Views: 130
  • 20240222_165932.webp
    20240222_165932.webp
    159.2 KB · Views: 123
  • 20240222_170229.webp
    20240222_170229.webp
    270.3 KB · Views: 132
  • 20240222_165739.webp
    20240222_165739.webp
    316 KB · Views: 140
  • 20240222_170636.webp
    20240222_170636.webp
    83.2 KB · Views: 139
  • 20240222_170258.webp
    20240222_170258.webp
    118.7 KB · Views: 135
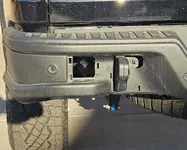
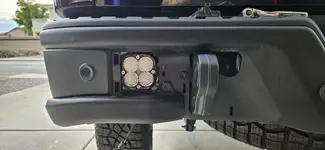
It was tedious as hell trying to get the AEV lights mounts and lights situated in the cutout. Eventually I got them, but both sides mounted slightly differently.

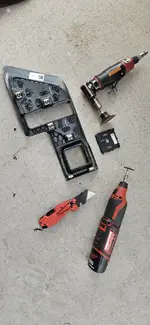
I trimmed the plastic cutout using a Dremel cutoff wheel. Start by just cutting off the very back at the bevel. Then trim up the edges with a utility knife and test fit. I needed to remove more matetial so then I used a die grinder and sanding disc. It was almost perfect after removing another 2 mm. Then had to take 1 mm on the outer edges as the lights aren't perfectly square.

They ended up looking pretty good, but you cut off the edges of the LED lenses.

They seem to give off plenty of light. I'd give the whole thing about 7/10 as it shouldn't be so difficult to get a clean install with an expensive bumper.
 

Attachments

  • 20240225_155452.webp
    20240225_155452.webp
    425.5 KB · Views: 113
  • 20240225_155318.webp
    20240225_155318.webp
    143.8 KB · Views: 108
  • 20240225_160857.webp
    20240225_160857.webp
    162.3 KB · Views: 118
  • 20240225_165801.webp
    20240225_165801.webp
    121.1 KB · Views: 118
  • 20240225_165646.webp
    20240225_165646.webp
    96 KB · Views: 123
  • 20240225_173120.webp
    20240225_173120.webp
    92.8 KB · Views: 108
Looks good, definitely hard to understand why AEV didn't just make the cutouts for standard cube lights. Seems like the plastic is plenty big enough. It just wasn't designed for them. Chevy probably told them we want everything proprietary so most owners have to go through chevy accessories, lol
 
Looks good, definitely hard to understand why AEV didn't just make the cutouts for standard cube lights. Seems like the plastic is plenty big enough. It just wasn't designed for them. Chevy probably told them we want everything proprietary so most owners have to go through chevy accessories, lol
Yeah. If it would have just been a flat piece of metal across the bumper, you could have made your own cut and mounted a flush mount light. I thought about replacing that plastic, but there are a lot of bolts and fasteners hid beneath them. Decided it probably wasn't going to be very easy to do.

I am fabbing my own brackets to fill those oddly shaped front bumper cut outs. Then I'm using those flush mount Squadron lights which should clean up the bumper and add a decent amount of extra light.
 
It was tedious as hell trying to get the AEV lights mounts and lights situated in the cutout. Eventually I got them, but both sides mounted slightly differently.

I trimmed the plastic cutout using a Dremel cutoff wheel. Start by just cutting off the very back at the bevel. Then trim up the edges with a utility knife and test fit. I needed to remove more matetial so then I used a die grinder and sanding disc. It was almost perfect after removing another 2 mm. Then had to take 1 mm on the outer edges as the lights aren't perfectly square.

They ended up looking pretty good, but you cut off the edges of the LED lenses.

They seem to give off plenty of light. I'd give the whole thing about 7/10 as it shouldn't be so difficult to get a clean install with an expensive bumper.
Hey those look great. All the work paid off brother.
 
Genesis 1:3-5 says: And God said, “Let there be light,” and there was light. And God saw that the light was good. And God separated the light from the darkness.

But sometimes you need a little more light in the darkness too. These Baja Designs Squadron work scene lights mounted in the rear Bison bumper will give you plenty of light.

I was worried they might not put out as much and since some of the lense is blocked by the small cutout I thought it might be compromised. But these things are so damn bright, they light up the whole neighborhood.

They might be a little too bright for my needs as they might produce a lot of reflection of my campers and trailers when hooking and unhooking in the dark. I might have to add some tint to tame them down a bit.

Here some pictures in front of my house near a streetlight. Looks like the sun rising on the house next door. You can see a huge difference in the backup camera. You'd blind people in a parking lot.
crime scene flood lights...nice!!!
 
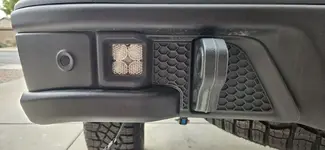
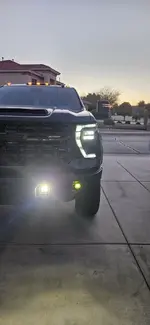
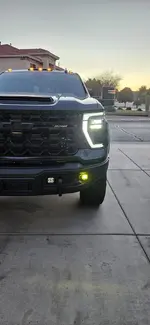
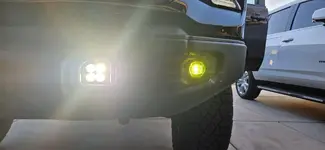
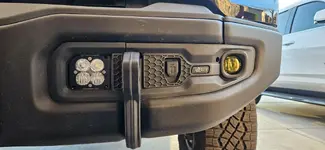
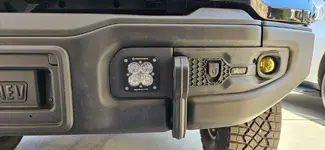
I got the brackets for the front lights fabbed up, but the light bezel is just a hair too short on both sides to close that gap. I don't really care for the light being set back behind the plastic bezel. Might be able to add some trim around the plastic bezel and get it sealed up. Might look sloppy though.

I tested the light on the outside of the plastic bezel and I think I like it better that way. I think I'm gonna cut put a a piece of heavy Kydex to fill in the plastic bezel and attach it to the light and change the bracket a little more to get it forward. Might look a little cleaner and closer to how it should have came.

I really like these lights, so I'm gonna make something that works with them

Also pulled the stock fog lights and added some yellow film. Not sure I like that yet or not. It would be much better for snow and fog.

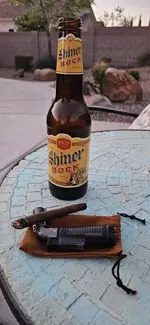
Had to settle for A Shiner and a Backwoods while I contemplate a little more.
 

Attachments

  • 20240302_183919.webp
    20240302_183919.webp
    156.5 KB · Views: 140
  • 20240302_183317.webp
    20240302_183317.webp
    116 KB · Views: 137
  • 20240302_183119.webp
    20240302_183119.webp
    129.3 KB · Views: 131
  • 20240302_180617.webp
    20240302_180617.webp
    53 KB · Views: 139
  • 20240302_175500.webp
    20240302_175500.webp
    205.6 KB · Views: 142
Last edited:
I got the brackets for the front lights fabbed up, but the light bezel is just a hair too short on both sides to close that gap. I don't really care for the light being set back behind the plastic bezel. Might be able to add some trim around the plastic bezel and get it sealed up. Might look sloppy though.

I tested the light on the outside of the plastic bezel and I think I like it better that way. I think I'm gonna cut put a a piece of heavy Kydex to fill in the plastic bezel and attach it to the light and change the bracket a little more to get it forward. Might look a little cleaner and closer to how it should have came.

I really like these lights, so I'm gonna make something that works with them

Also pulled the stock fog lights and added some yellow film. Not sure I like that yet or not. It would be much better for snow and fog.

Had to settle for A Shiner and a Backwoods while I contemplate a little more.
very nice @AXE ...nice torch!!!
 
  • Like
Reactions: AXE
I got the brackets for the front lights fabbed up, but the light bezel is just a hair too short on both sides to close that gap. I don't really care for the light being set back behind the plastic bezel. Might be able to add some trim around the plastic bezel and get it sealed up. Might look sloppy though.

I tested the light on the outside of the plastic bezel and I think I like it better that way. I think I'm gonna cut put a a piece of heavy Kydex to fill in the plastic bezel and attach it to the light and change the bracket a little more to get it forward. Might look a little cleaner and closer to how it should have came.

I really like these lights, so I'm gonna make something that works with them

Also pulled the stock fog lights and added some yellow film. Not sure I like that yet or not. It would be much better for snow and fog.

Had to settle for A Shiner and a Backwoods while I contemplate a little more.
Did you completely take out the stock fog lights? How was that?
 
Yes, it's not too hard to remove them. There are three screws in the back and then unplug the wire. You can remove the side covers under the bumper by removing the five screws. It was easy with the skid already off.

It's hard to get them covered as the film wants to wrinkle on the perimeter of the glass because of the round shape. I used a hair dryer and just kept stretching it and lifting it as I worked my way around. Then I used a razor knife trim around the black plastic base.

Jury is out on the color. In the day, it looks a little lime green. But at night it didn't seem as bad. Color looked yellow on my garage door tho. It's quality materials. Got it on Amazon as recommended by others here.

VViViD Air-Tint Golden Yellow Headlight/Tail Light Window Tint (12 Inch x 24 Inch roll x2) https://a.co/d/esuDAWO

I'll run them a while and see how they hold up.
 

Attachments

  • 20240303_141756.webp
    20240303_141756.webp
    147.6 KB · Views: 68
  • 20240303_141812.webp
    20240303_141812.webp
    156.8 KB · Views: 65
Last edited:
very nice @AXE ...nice torch!!!
Got a two pack on Amazon for $15. It's one of the better ones I've used. I have one in my garage for when I need to melt plastic or shrink wrap wires, etc.

LcFun Torch Lighter 2 Pack Refillable Gas Butane Lighter Windproof Flame Lighter Single Jet Lighters Butane Torch Lighter for Candle, Campfire, Outdoor Fire Pit, Grill, Camping -Butane NOT Included https://a.co/d/6IRMP8F
 
Here's a picture from tonight. They do look better at night. Would need to be in unlit area to make a final determination.

Definitely would not do this if I wasn't adding more lights, cause you do get more light on the side with the white lights.
 

Attachments

  • 20240303_200730.webp
    20240303_200730.webp
    96 KB · Views: 77
  • 20240303_200752.webp
    20240303_200752.webp
    113 KB · Views: 78
I had some Austin's about wiring, so I'll post what I did and couple of pictures.

I connected both my front and rear harness into the drivers side battery. I used wire harnesses that were made to fit the Baja Designs lights front and rear. You had to extend the rear pigtail by alot as it a long way from drivers side battery to passenger side rear bumper. The Baja Designs harness is long enough for the front bumper lights.

I brought the rear harness forward over top of the spare tire and through a number of other wires and lines behind the fuel tank. It's hard to navigate through that mess, so drop the spare and it's much easier. Then I brought the harness up and I've the tank so it would drop down to the dri ets side frame rail just at the rear of the cab. Then followed the existing wire harness up to the wheel well. Ran the harness up over the body to frame mount and up through wheel well behind coolant overflow tank. It's easier to remove rear portion of wheel well liner, that way you can make a clean path and secure it properly to existing wires. Lots of places to tie wrap, so follow the logical path.

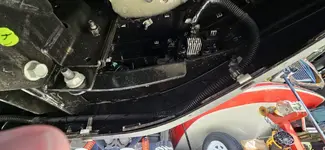
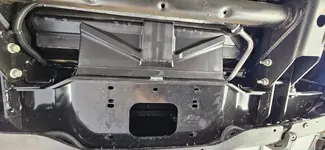
The front harness was brought forward behind the washer fluid tank. Then dropped down behind headlight to the bumper. Then across the bumper where the winch opening is located. Lots of room there, just drop the front skid plate.

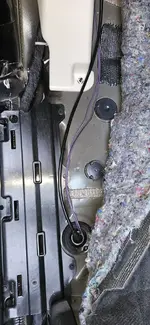
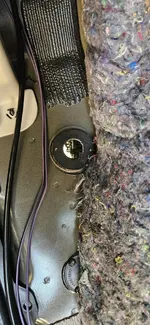
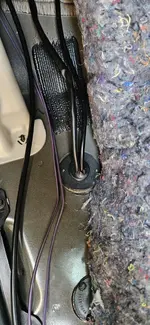
I brought the switches into the cab by cutting a hole in one of the plastic caps under the carpeted floorboard by your left foot. I then installed a grommet and added some silicone to the bottom side to weatherproof it.
 

Attachments

  • 20240229_140816.webp
    20240229_140816.webp
    153.8 KB · Views: 75
  • 20240228_172653.webp
    20240228_172653.webp
    336.7 KB · Views: 77
  • 20240228_173621.webp
    20240228_173621.webp
    299.2 KB · Views: 77
  • 20240226_172951.webp
    20240226_172951.webp
    295 KB · Views: 74
  • 20240303_141700.webp
    20240303_141700.webp
    174 KB · Views: 72
  • 20240303_141756.webp
    20240303_141756.webp
    147.6 KB · Views: 73
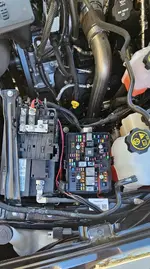
One more picture of relays tied into battery terminals. Also not the micro fuse tap in the fuse box. That is for the Wireless One air compressor relay. It's tied into fuse 39 which is ignition on. If your doing your own relays and switches this would work for your you. I used rewire harness with the relay, switch and wires/terminals, so that's why they are hooked directly to battery.
 

Attachments

  • 20240305_130556.webp
    20240305_130556.webp
    234.3 KB · Views: 71
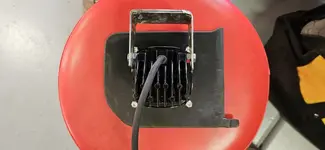
I got some .125 Kydex material and fabbed a replacement trim piece for the light to mount flush with surface of bumper. Kydex color and texture match the bumper very well. It took a lot of time to cut, trim, and sand edges to get the fitment pretty good. Still have a little more tweaking to do to beveled the inside edges and will polish the edges with a Dremel to finish it off.

The flush mount light bolted into the Kydex very solidly which should make it more durable.

I am probably going to redo the light mount bracket for the third time. I am not happy with how it supports the light from behind. Need a little more flexibility to get it to hold the Kydex firmly to bumper. I guess the 3rd time is the charm.

Overall, happy with progress, in spite of it taking a lot of time.
 

Attachments

  • 20240305_171720.webp
    20240305_171720.webp
    233.3 KB · Views: 92
  • 20240305_173642.webp
    20240305_173642.webp
    111.6 KB · Views: 91
  • 20240305_173550.webp
    20240305_173550.webp
    197 KB · Views: 89
I got some .125 Kydex material and fabbed a replacement trim piece for the light to mount flush with surface of bumper. Kydex color and texture match the bumper very well. It took a lot of time to cut, trim, and sand edges to get the fitment pretty good. Still have a little more tweaking to do to beveled the inside edges and will polish the edges with a Dremel to finish it off.

The flush mount light bolted into the Kydex very solidly which should make it more durable.

I am probably going to redo the light mount bracket for the third time. I am not happy with how it supports the light from behind. Need a little more flexibility to get it to hold the Kydex firmly to bumper. I guess the 3rd time is the charm.

Overall, happy with progress, in spite of it taking a lot of time.
That looks considerably better than the original AEV plastic piece!
 
  • Like
Reactions: AXE
That looks considerably better than the original AEV plastic piece!
Thanks. I am happy I decided to use the Kydex, as it's very ridged and workable. I might go one size heavier if I did it again. That would give me a little more material to bevel those inside edges for a perfect fit.

I heated that little tab up and used a flat edge of chisel to get that little bevel made so it would tuck behind the stock piece.

I think if I ever get this mount right, I can work those edges a bit more and it should fit pretty good.
Looks good! I make Kydex holsters from time to time. .125 kydex is some pretty thick stuff lol. Atleast when it comes to holsters. .080 is kind of the standard for holsters. I think the thickest I've used is .093. Kydex is cool stuff. I've used it for other things a few times. Heck I made a shelf grid for a gun safe door using it.
 
Back
Top